Trong bài này, chúng ta sẽ tìm hiểu về cách upload file lên web server trong PHP. Để học tốt bài này, các bạn cần đọc lại bài Cài đặt môi trường lập trình Web PHP với XAMPP để biết cách chạy ứng dụng web PHP với XAMPP.
1. Tạo html form để upload file
Chúng ta có thể tạo một html form để upload file với thuộc tính enctype.
<!DOCTYPE html>
<html>
<head>
  <title>Upload file to gochocit.com!</title>
</head>

<body>

<form action="upload.php" method="post" enctype="multipart/form-data">
  <b>Select a file to upload:</b>
  <br>
  <input type="file" name="fileUpload" id="fileUpload">
  <br><br>
  <input type="submit" value="Upload" name="submit">
</form>

</body>
</html>
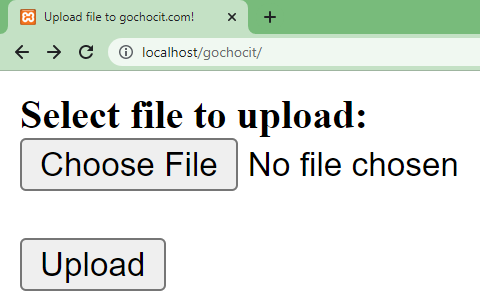
Trong ví dụ trên, html form có thuộc tính enctype="multipart/form-data". Với thuộc tính này, html form cho phép chúng ta upload file lên web server. Thẻ <input> với type=”file” cho phép chúng ta chọn đường dẫn của file cần upload. Sau khi nhấn nút Upload thì dữ liệu trong html form sẽ được gửi đến file upload.php để xử lý.
2. Xử lý upload file với PHP
2.1. Cấu hình upload file trong php.ini
Để upload file lên web server thì cần đảm bảo cấu hình PHP cho phép upload file. Mở file php.ini (xem hướng dẫn ở phần Thay đổi default timezone trong PHP), tìm đến cấu hình file_uploads và gán giá trị là On.
file_uploads = On2.2. Xử lý upload file với PHP
Bên dưới là một đoạn code của file upload.php để xử lý file được upload.
<?php
if(isset($_POST["submit"])) {
    if(isset($_FILES['fileUpload'])){
        echo var_dump($_FILES);
    }else {
        echo "No files selected.";
    }
}
?>
Khi upload một file lên web server, tất cả thông tin về file sẽ được lưu trữ trong biến $_FILES. Giả sử, chúng ta upload file gochocit.txt như hình bên dưới.

Biến $_FILES là một mảng kết hợp có cấu trúc như sau:
array(1) {
  ["fileUpload"]=> array(5) {
    ["name"]=> string(12) "gochocit.txt"
    ["type"]=> string(10) "text/plain"
    ["tmp_name"]=> string(24) "C:\xampp\tmp\phpD335.tmp"
    ["error"]=> int(0)
    ["size"]=> int(121)
  }
}
Trong đó,
– fileUpload: là key của mảng tương ứng name của thẻ <input type="file"> trong html form
– name: tên của file được upload.
– type: loại file tùy vào đuôi mở rộng của file, có thể là text/plain, image/jpg, image/png,…
– tmp_name: là file tạm lưu trữ file được upload.
– error: mã lỗi khi upload, nếu errror = 0 thì không lỗi.
– size: kích thước file tính bằng byte.
Khi file đã được upload lên server, chúng ta có thể thực hiện các thao tác khác nhau trên file này:
– Kiểm tra file có bị lỗi không?
– Kiểm tra loại file upload có được phép không?
– Kiểm tra dung lượng của file có vượt quá giới hạn cho phép không?
– Kiểm tra file đã tồn tại trên server chưa?
– Lưu file vào một thư mục trên server.
– …
<?php
if(isset($_POST["submit"])) {
    if(isset($_FILES['fileUpload'])){
        //Thư mục bạn lưu file upload
        $target_dir = "uploads/";
        //Đường dẫn lưu file trên server
        $target_file   = $target_dir . basename($_FILES["fileUpload"]["name"]);
        $allowUpload   = true;
        //Lấy phần mở rộng của file (txt, jpg, png,...)
        $fileType = pathinfo($target_file, PATHINFO_EXTENSION);
        //Những loại file được phép upload
        $allowtypes    = array('txt', 'dat', 'data');
        //Kích thước file lớn nhất được upload (bytes)
        $maxfilesize   = 10000000;//10MB

        //1. Kiểm tra file có bị lỗi không?
        if ($_FILES["fileUpload"]['error'] != 0) {
            echo "<br>The uploaded file is error or no file selected.";
            die;
        }

        //2. Kiểm tra loại file upload có được phép không?
        if (!in_array($fileType, $allowtypes )) {
            echo "<br>Only allow for uploading .txt, .dat or .data files.";
            $allowUpload = false;
        }

        //3. Kiểm tra kích thước file upload có vượt quá giới hạn cho phép
        if ($_FILES["fileUpload"]["size"] > $maxfilesize) {
            echo "<br>Size of the uploaded file must be smaller than $maxfilesize bytes.";
            $allowUpload = false;
        }

        //4. Kiểm tra file đã tồn tại trên server chưa?
        if (file_exists($target_file)) {
            echo "<br>The file name already exists on the server.";
            $allowUpload = false;
        }

        if ($allowUpload) {
            //Lưu file vào thư mục được chỉ định trên server
            if (move_uploaded_file($_FILES["fileUpload"]["tmp_name"], $target_file)) {
                echo "<br>File ". basename( $_FILES["fileUpload"]["name"])." uploaded successfully.";
                echo "The file saved at " . $target_file;

            } else {
                 echo "<br>An error occurred while uploading the file.";
            }
        }
    }
}
?>
2.3. Lọc (filter) các file được upload
Chúng ta có 2 cách để lọc (filter) các file được upload lên web server.
Cách thứ 1 – Sử dụng thuộc tính accept trong thẻ <input type="file">
<form action="upload.php" method="post" enctype="multipart/form-data">
  <b>Select file to upload:</b>
  <br>
  <input type="file" name="fileUpload" id="fileUpload" accept=".txt, .data, .dat">
  <br><br>
  <input type="submit" value="Upload" name="submit">
</form>
Cách thứ 2 – Upload file rồi kiểm tra loại file với PHP
//Lấy phần mở rộng của file (txt, jpg, png,...)
$fileType = pathinfo($target_file, PATHINFO_EXTENSION);
//Những loại file được phép upload
$allowtypes    = array('txt', 'dat', 'data');
//2. Kiểm tra loại file upload có được phép không?
if (!in_array($fileType, $allowtypes )) {
   echo "<br>Only allow for uploading .txt, .dat or .data files.";
   $allowUpload = false;
}
3. Xử lý upload nhiều file với PHP
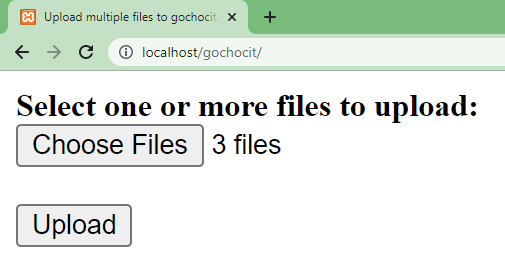
Chúng ta có thể upload nhiều file cùng một lúc với thẻ <input> có thuộc tính multiple="multiple". Lưu ý: name của thẻ <input> phải có thêm dấu ngoặc vuông [], thể hiện là một mảng chứa nhiều file.
<!DOCTYPE html>
<html>
<head>
  <title>Upload multiple files to gochocit.com!</title>
</head>

<body>

<form action="upload-multiple-files.php" method="post" enctype="multipart/form-data">
  <b>Select one or more files to upload:</b>
  <br>
  <input type="file" name="fileUpload[]" id="fileUpload" multiple="multiple">
  <br><br>
  <input type="submit" value="Upload" name="submit">
</form>

</body>
</html>
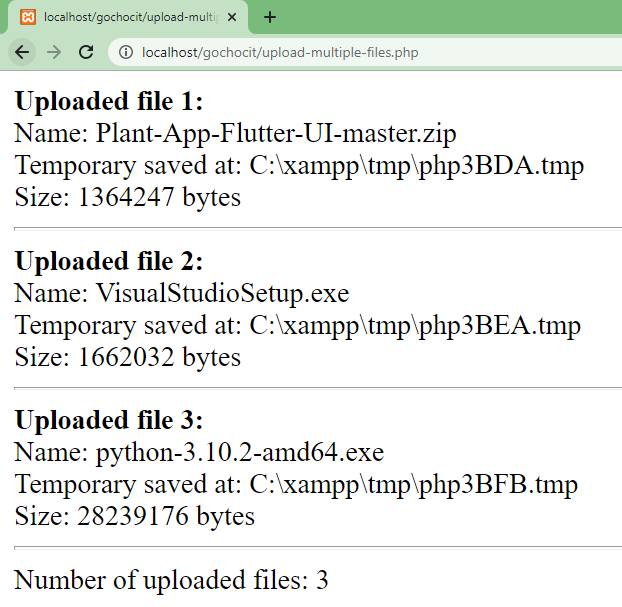
Chúng ta sẽ viết một file upload-multiple-files.php để xử lý upload nhiều file. Thông tin về các file sẽ được truy xuất từ $_FILES[‘fileUpload’] dưới dạng các mảng.
– $_FILES[‘fileUpload’][‘name’]: chứa các tên file được upload.
– $_FILES[‘fileUpload’][‘type’]: chứa các loại file được upload.
– $_FILES[‘fileUpload’][‘tmp_name’]: chứa các vị trí lưu tạm các file.
– $_FILES[‘fileUpload’][‘error’]: là mảng báo lỗi khi upload.
– $_FILES[‘fileUpload’][‘size’]: chứa kích thước các file được upload.
<?php
if(isset($_POST["submit"])) {
    if(isset($_FILES['fileUpload'])){
        //Thông tin các file được upload
        $files = $_FILES['fileUpload'];

        $names = $files['name'];
        $types = $files['type'];
        $tmp_names = $files['tmp_name'];
        $errors = $files['error'];
        $sizes = $files['size'];

        //Số file được upload
        $numitems = count($names);
        $numfiles = 0;
        for ($i = 0; $i < $numitems; $i++) {
            if ($errors[$i] == 0) {
                $numfiles++;
                echo "<b>Uploaded file $numfiles:</b><br>";
                echo "Name: $names[$i] <br>";
                echo "Temporary saved at: $tmp_names[$i] <br>";
                echo "Size: $sizes[$i] bytes<br><hr>";
            }
        }
        echo "Number of uploaded files: " .$numfiles;
    }
}
?>
Kết quả các file được upload.
Sau khi truy xuất đến từng file được upload, các bạn có thể thực hiện các thao tác trên từng file như bình thường.